IDEs
- Jetbrains IDEs 通过 Toolbox App 安装 & 管理
- Visual Studio Code 使用官网安装包:https://code.visualstudio.com/
- vim 后续仅在 WSL2 中安装使用
包管理 & 终端环境
Chocolatey
尽管现在 Windows 11 预装了 winget 包管理器,但是之前习惯了 Chocolatey,所以还是照旧。
参考 官方安装文档 食用
gsudo
在 PowerShell/CMD 终端中类似 Linux sudo 体验的通过管理员执行命令。 微软自家的 sudo 暂未在正式版 Windows 11 中提供,未来可以替换掉。
项目地址:https://github.com/gerardog/gsudo
Starship
通过 choco 安装 starship Shell 增强工具,然后在 PowerShell Profile 中加入以下行:
Invoke-Expression (&starship init powershell)初始化配置:
mkdir -p ~/.config
code ~/.config/starship.toml
starship.toml 配置内容参考官网指引:
# Get editor completions based on the config schema
"$schema" = 'https://starship.rs/config-schema.json'

# Inserts a blank line between shell prompts
add_newline = true
重启终端即可生效,若遇到提示安全提示不能执行脚本的问题,可以去 设置 - 系统 - 开发者选项,打开此开关:

Node.js with fnm
fnm: https://github.com/Schniz/fnm
先通过 choco 安装 fnm 包管理器,然后在 PowerShell Profile 中加入以下行:
fnm env --use-on-cd | Out-String | Invoke-Expression重新打开终端后,再执行以下命令安装自己所需的版本:
fnm use --install-if-missing 20WSL2
初始化 & 指定发行版本安装
检查主板 BIOS 中有没有打开虚拟化特性,保证 Hyper-V 虚拟机可用
- 简单安装:直接执行
wsl,工具会自动下载必需的组件和 Ubuntu 作为默认发行版本 - 指定发行版本安装:TODO
代理配置
参考:https://gist.github.com/libChan/3a804a46b532cc326a2ee55b27e8ac19
编译环境
sudo apt-get install build-essential gdbDocker
Docker 现已支持使用 WSL2 作为后端(取代 Hyper-V 虚拟机),根据官网文档介绍推荐使用 Docker for Desktop 方式安装:https://docs.docker.com/desktop/wsl/
此处不在 WSL2 内直接安装 Docker,方便后面 Windows 环境下的其它开发工具交互操作。
远程连接
SSH Server
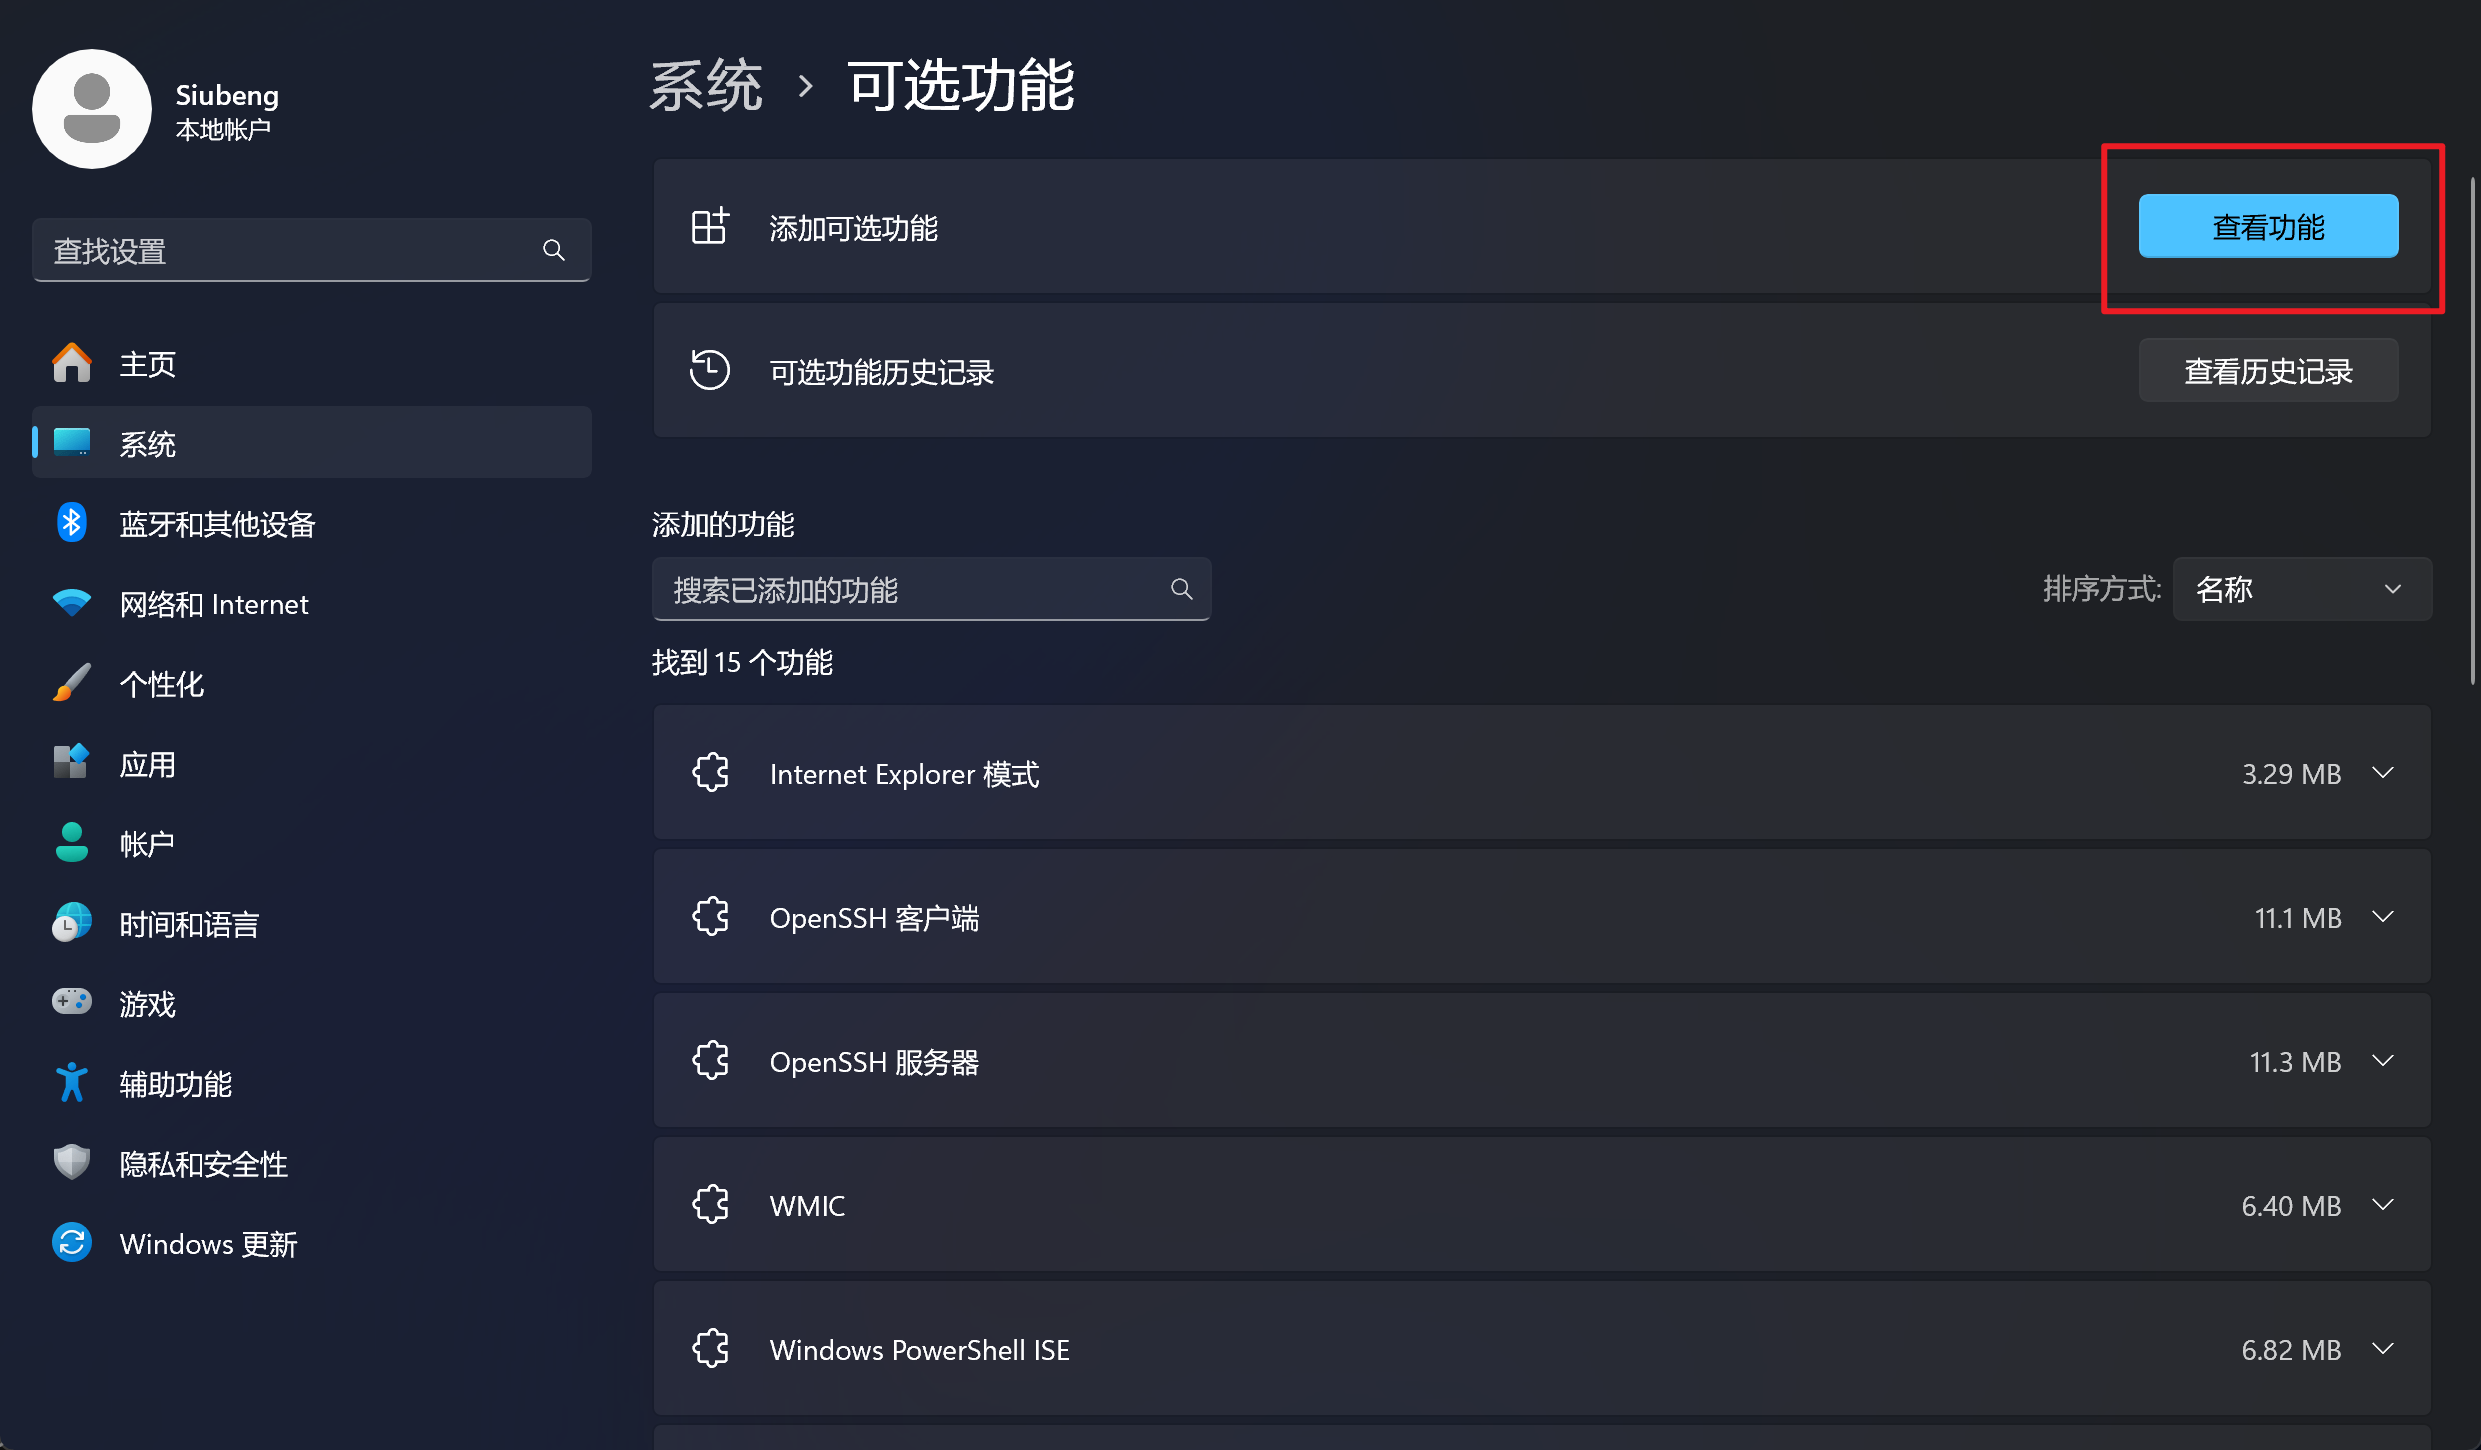
Windows 11 默认不会像 Linux 一样提供 sshd/OpenSSH Server,但系统自带设置可以快速安装。在 设置 - 系统 - 可选功能 中,添加可选功能,找到【OpenSSH 服务器】并安装
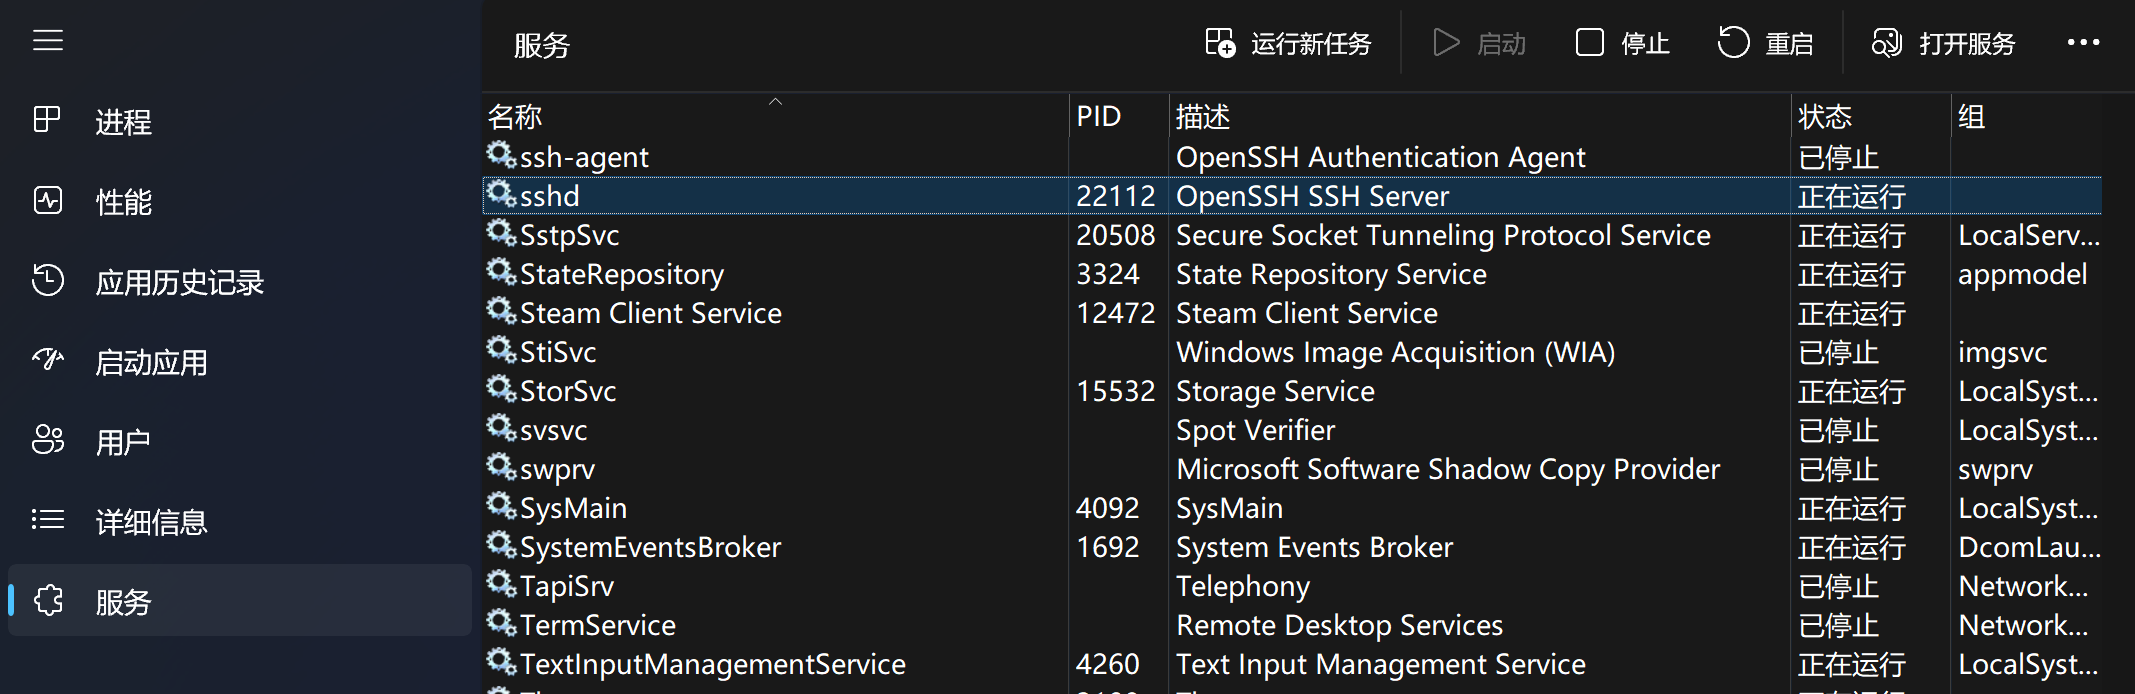
安装完成后无需重启,打开任务管理器 - 服务 Tab,找到 sshd,右键启动,就可以在 SSH Client 使用你的 Windows 用户账号和密码远程连接到这台 PC 了。
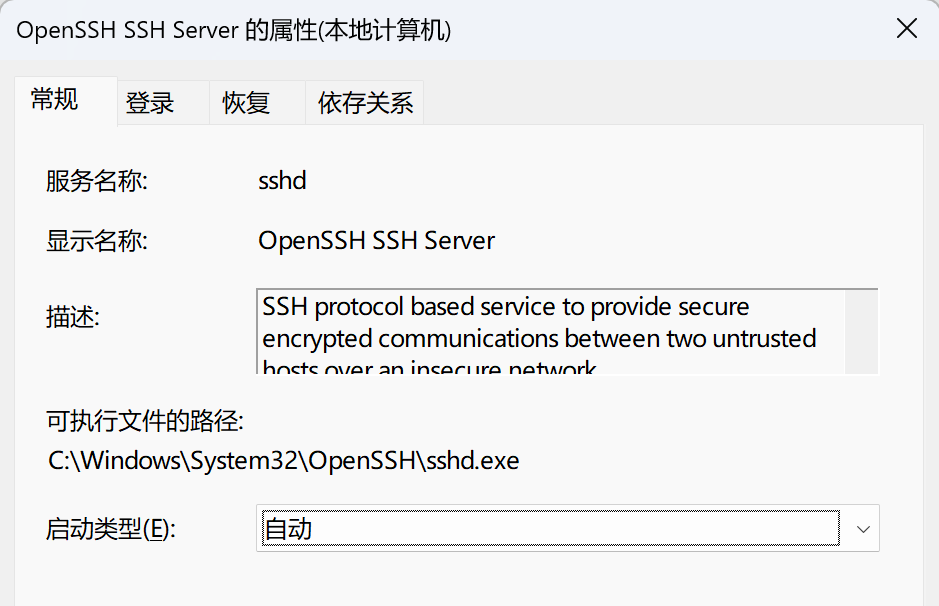
最后,在 services.msc 打开服务管理,将 sshd 服务设置为自动,这样每次开机都不用手动启动:
字体
- 更纱黑体:https://github.com/be5invis/Sarasa-Gothic
- 思源黑体:https://github.com/adobe-fonts/source-han-sans
- 思源宋体:https://github.com/adobe-fonts/source-han-serif
- 霞鹜文楷:https://github.com/lxgw/LxgwWenKai
原文来自于我的 Notion 笔记:https://siubeng-dev.notion.site/Windows-1b1727bcc4ad41c5a4173fa365f44689?pvs=4